
BBCF/Weiss Schnee: Difference between revisions
Jump to navigation
Jump to search


{{{hitbox}}}
{{{hitbox}}}
{{{hitbox}}}
File:BBTag Weiss Schnee Icon.png Weiss Schnee
Crimsongaia (talk | contribs) No edit summary Tags: Manual revert Reverted |
Crimsongaia (talk | contribs) |
||
| (146 intermediate revisions by the same user not shown) | |||
| Line 2: | Line 2: | ||
{{FP Box|content='''This page is under construction, please ignore it for the time being''' | {{FP Box|content='''This page is under construction, please ignore it for the time being''' | ||
}} | }} | ||
<div id=" | <div id="mf-home" class="fpcontentbbcf"> | ||
<div id="fpflexsection"> | |||
__TOC__ | __TOC__ | ||
</div> | </div> | ||
| Line 15: | Line 16: | ||
At the same time, these tools all have very clear pros and cons. For example, her normals often have long reach but don't hit in a wide arc like Ruby's normals. As a result, a lot of Weiss' tools need to be selectively chosen to deal with a specific problem. To get the most out of Weiss' vast toolset, you'll need to train yourself to properly recognize situations and use the appropriate tool to handle it. | At the same time, these tools all have very clear pros and cons. For example, her normals often have long reach but don't hit in a wide arc like Ruby's normals. As a result, a lot of Weiss' tools need to be selectively chosen to deal with a specific problem. To get the most out of Weiss' vast toolset, you'll need to train yourself to properly recognize situations and use the appropriate tool to handle it. | ||
While her buttons can be oppressive, Weiss is highly susceptible to pushblock, having few options to get back in on the opponent without ending her turn or wasting resources. It can be difficult for her to maintain pressure without using committal options that can be stuffed out. | While her buttons can be oppressive, Weiss is highly susceptible to pushblock, having few options to get back in on the opponent without ending her turn or wasting resources. It can be difficult for her to maintain pressure without using committal options that can be stuffed out.<br> | ||
<br> | |||
{{ProsAndCons | {{ProsAndCons | ||
|intro= [[File:Smallweissicon.png|32px]] ''Weiss is a mid-range | |intro= [[File:Smallweissicon.png|32px]] ''Weiss is a mid-range character who uses her long normals and burst mobility to control space and create setplay oki with her semblance or [[#Ice Pillar|Ice Pillar]].'' | ||
|pros= | |pros= | ||
* Long-ranged normals | * Long-ranged normals | ||
* Great pressure tools | * Great pressure tools | ||
* Proficient corner game | * Proficient corner game | ||
* Land cancels allow her to extend combos, continue pressure, maintain momentum, and/or stay defensive | * Land cancels allow her to extend combos, continue pressure, maintain momentum, and/or stay defensive | ||
* Can use Ice pillar ({{clr|4|22A}}/{{clr|2|B}}) to wall out specific characters, force an approach, or cut off rolls on wakeup | |||
* Can use Ice pillar | |||
* Fantastic corner carry | * Fantastic corner carry | ||
|cons= | |cons= | ||
| Line 51: | Line 30: | ||
* Steep learning curve; requires a good understanding of neutral and proper execution to play | * Steep learning curve; requires a good understanding of neutral and proper execution to play | ||
* Anti-air can be unreliable against specific approaches | * Anti-air can be unreliable against specific approaches | ||
* Weak defensive options: Weiss lacks a reversal outside of her EA. Her closest option is [[#Ice Parry|Ice Parry]] ({{clr|5|236D}}), which doesn't have invul until frame 4 and costs meter. | |||
* Aside from glyph follow-ups and {{clr|3|j.C}} (In specific matchups), has no real way of opening opponents guard without using risky options (IAD in, glyph, etc.) | * Aside from glyph follow-ups and {{clr|3|j.C}} (In specific matchups), has no real way of opening opponents guard without using risky options (IAD in, glyph, etc.) | ||
}} | }}}} | ||
}} | |||
{{card|width=2 | {{card|width=2 | ||
|header=Weiss Schnee | |header=Weiss Schnee | ||
| Line 71: | Line 50: | ||
'''Fatal Starters:''' 6C | '''Fatal Starters:''' 6C | ||
Ice Shard | Ice Shard | ||
}}</div> | |||
{{card|width=3 | |||
|header=Semblance: Glyphs | |||
|content= | |||
Weiss' semblance allows her to set magical glyphs around the stage by using her Drive normals, holding different directions to control the location the glyph is spawned at. | |||
* By tapping the {{clr|5|D}} button she will place a White [[#Drive Normals|Ice Shard]] Glyph, which launches a projectile after a delay before disappearing. The timing of the shot depends on the version used. | |||
* By holding the {{clr|5|D}} button she will place a Black [[#Drive Normals|Gravity Glyph]] which can then be used during [[#Glyph Dash Strike|Glyph Dash Strike]] or [[#Snowfall|Snowfall]], by pressing (or holding down) {{clr|4|8A}}, {{clr|2|8B}}, or {{clr|3|8C}} once she is in close proximity to a gravity glyph. These glyphs won't disappear unless a new glyph of the same type (near/far/air) is used. | |||
<br> | |||
Weiss also has access to a set of special moves that consume 25% Heat. Similar to Jin Kisaragi, all of these specials use the {{clr|5|D}} button. | |||
|header2=Overdrive | |||
|content2= | |||
Weiss' Overdrive powers up many aspects of her semblance. Enhancing some moves that utilize glyphs, and giving her some new ones to boot. | |||
* Weiss no longer has to pick between Ice Shard or a Gravity Glyph. Using any {{clr|5|D}} normals will summon both on top of each other. All white glyphs created during OD will fire the Ice Shard on frame 70. | |||
* Weiss can cancel into {{clr|4|8A}} [[#Twisting Air Step|Twisting Air Step]], {{clr|2|8B}} [[#Piercing Air Step|Piercing Air Step]], or {{clr|3|8C}} [[#Pirouette|Pirouette]] from any normal on-hit or on-block assuming a black gravity glyph is nearby. | |||
* Instead of [[#Ice Pillar|Ice Pillar]], {{clr|4|22A}}/{{clr|2|B}} becomes [[#Ice Shatter|Ice Shatter]], a long range freeze attack. | |||
* Gains access to {{clr|5|8D}} [[#Glyph Step|Glyph Step]], which works similar Izanami's hover, allowing Weiss to extend combos and blockstrings. | |||
}} | }} | ||
==Normals== | ==Normals== | ||
===<big>{{clr| | ===<big>{{clr|4|5A}}</big>=== | ||
{{BBCF Move Card | {{BBCF Move Card | ||
| image=[[file:Rwi5a.png|220px|test caption|style="margin: auto; width: 100%; max-width: 2560px;"]] | | image=[[file:Rwi5a.png|220px|test caption|style="margin: auto; width: 100%; max-width: 2560px;"]] | ||
| Line 84: | Line 80: | ||
* Startup is two frames faster than {{clr|2|5B}}, and can OTG. | * Startup is two frames faster than {{clr|2|5B}}, and can OTG. | ||
<br> | <br> | ||
Secondary poke tool. Unlike {{clr| | Secondary poke tool. Unlike {{clr|2|5B}}, can hit some crouching opponents. It being a 7 frame option allows for her to contest stronger round starts and hit low profiling moves. | ||
}} | }} | ||
| Line 97: | Line 93: | ||
*Excellent round starter, being able to hit most characters at round start. | *Excellent round starter, being able to hit most characters at round start. | ||
<br> | <br> | ||
{{clr|2|5B}} is your primary poking tool boasting good reach and fast startup. Unlike {{clr| | {{clr|2|5B}} is your primary poking tool boasting good reach and fast startup. Unlike {{clr|4|5A}}, it's hitbox only covers Myrtenaster, meaning it will whiff on many crouchers and low profile attacks. | ||
}} | }} | ||
| Line 109: | Line 105: | ||
* If cancelled into from {{clr|2|6B}}, frames 1-6 are skipped | * If cancelled into from {{clr|2|6B}}, frames 1-6 are skipped | ||
<br> | <br> | ||
ayo i need to changee the head invul that is way too much | |||
}} | }} | ||
===<big>{{clr| | ===<big>{{clr|4|2A}}</big>=== | ||
{{BBCF Move Card | {{BBCF Move Card | ||
| image=[[file:Rwi2a.png|220px|test caption|style="margin: auto; width: 100%; max-width: 2560px;"]] | | image=[[file:Rwi2a.png|220px|test caption|style="margin: auto; width: 100%; max-width: 2560px;"]] | ||
| Line 123: | Line 115: | ||
|description= | |description= | ||
* Jump-cancelable on block and on hit. | * Jump-cancelable on block and on hit. | ||
* Chains into itself 3 times like most {{clr| | * Chains into itself 3 times like most {{clr|4|2A}}. | ||
<br> | <br> | ||
Larger than average range for a {{clr| | Larger than average range for a {{clr|4|2A}}; one of Weiss' greatest tools. During neutral you'll want to mix this with {{clr|4|5A}} against a grounded opponent to keep them from getting up, close and personal. One of Weiss' strongest pressuring tools, as it allows for potential TRM setups/tickthrows, frametraps, and even callouts. | ||
}} | }} | ||
| Line 134: | Line 126: | ||
| damage=700 | guard=Low | startup=12 | active=3 | recovery=18 | frameadv=-4 | attribute=Foot | invul= | strate=and | p1=this | p2=is | atklv=additional | odr=data | | damage=700 | guard=Low | startup=12 | active=3 | recovery=18 | frameadv=-4 | attribute=Foot | invul= | strate=and | p1=this | p2=is | atklv=additional | odr=data | ||
|description= | |description= | ||
Low poke with really good range. Mostly used either during blockstrings or extend combos. Not so much a move to consider while in neutral | Low poke with really good range. Mostly used either during blockstrings or to extend combos. Not so much a move to consider while in neutral, as it has long startup and hits really low, leaving her wide open if jumped over. This move is highly susceptible to barrier, as it can cause {{clr|3|5C}} and {{clr|3|3C}} followups to whiff. | ||
}} | }} | ||
| Line 140: | Line 132: | ||
{{BBCF Move Card | {{BBCF Move Card | ||
| image=[[file:Rwi2c.png|220px|test caption|style="margin: auto; width: 100%; max-width: 2560px;"]] | | image=[[file:Rwi2c.png|220px|test caption|style="margin: auto; width: 100%; max-width: 2560px;"]] | ||
| hitbox=[[file: | | hitbox=[[file:Rwi2chit.png|220px|test caption]] | ||
| damage=800 | guard=Mid | startup=13 | active=3 | recovery=27 | frameadv=-11 | attribute=Body | invul=11~16 Head | strate=and | p1=this | p2=is | atklv=additional | odr=data | | damage=800 | guard=Mid | startup=13 | active=3 | recovery=27 | frameadv=-11 | attribute=Body | invul=11~16 Head | strate=and | p1=this | p2=is | atklv=additional | odr=data | ||
|description= | |description= | ||
* Jump-cancelable on block and on hit. | * Jump-cancelable on block and on hit. | ||
* Has the same range as {{clr| | * Has the same range as {{clr|4|5A}}. | ||
* On-hit allows for safe Glyph setup. | * On-hit allows for safe Glyph setup. | ||
<br> | <br> | ||
| Line 151: | Line 143: | ||
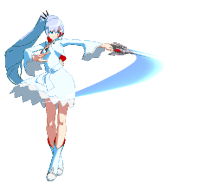
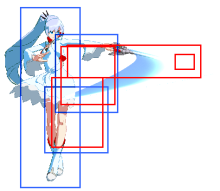
==Command Normals== | ==Command Normals== | ||
===<big>{{clr| | ===<big>{{clr|4|6A}}</big>=== | ||
{{BBCF Move Card | {{BBCF Move Card | ||
| image=[[file:Rwi6a.png|220px|test caption|style="margin: auto; width: 100%; max-width: 2560px;"]] | | image=[[file:Rwi6a.png|220px|test caption|style="margin: auto; width: 100%; max-width: 2560px;"]] | ||
| Line 162: | Line 154: | ||
<br> | <br> | ||
Although it can only be cancelled into from {{clr| | Although it can only be cancelled into from {{clr|4|5A}}, {{clr|2|5B}} and {{clr|4|2A}}, {{clr|4|6A}} is a great fakeout tool when used in stagger pressure. | ||
On hit, this move sends the opponent sliding, making it a decent combo ender [or extender with black glyphs]. Weiss can choose whether or not she wants to set up a glyph/pillar or safejump afterwards | On hit, this move sends the opponent sliding, making it a decent combo ender [or extender with black glyphs]. Weiss can choose whether or not she wants to set up a glyph/pillar or safejump afterwards. | ||
<br> | <br> | ||
On Counterhit, Weiss can setup a black glyph AND still have time to chain into {{clr| | On Counterhit, Weiss can setup a black glyph AND still have time to chain into {{clr|4|214A}}/{{clr|2|B}}/{{clr|5|D}} [[#Glyph Dash Strike|Glyph Dash Strike]], leading into massive damage. | ||
}} | }} | ||
| Line 205: | Line 197: | ||
| damage=800 | guard=Low | startup=16 | active=3 | recovery=27 | frameadv=-11 | attribute=Foot | invul= | strate=and | p1=this | p2=is | atklv=additional | odr=data | | damage=800 | guard=Low | startup=16 | active=3 | recovery=27 | frameadv=-11 | attribute=Foot | invul= | strate=and | p1=this | p2=is | atklv=additional | odr=data | ||
|description= | |description= | ||
* Has the same range as {{clr| | * Has the same range as {{clr|4|5A}} | ||
* Great combo ender, allows for safe glyph setup on hit | * Great combo ender, allows for safe glyph setup on hit | ||
<br> | <br> | ||
| Line 211: | Line 203: | ||
<br> | <br> | ||
{{clr|3|6C}} is Weiss' main combo ender when she isn't cashing out. Allowing her to safely place a glyph or {{clr| | {{clr|3|6C}} is Weiss' main combo ender when she isn't cashing out. Allowing her to safely place a glyph or {{clr|4|22A}}/{{clr|2|B}} [[#Ice Pillar|Ice Pillar]] in time to meaty the opponent's wakeup. | ||
<br> | <br> | ||
| Line 218: | Line 210: | ||
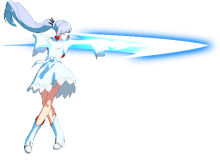
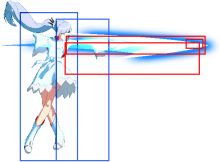
==Air Normals== | ==Air Normals== | ||
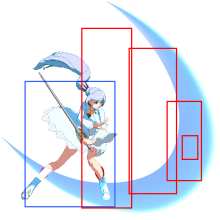
===<big>{{clr| | ===<big>{{clr|4|j.A}}</big>=== | ||
{{BBCF Move Card | {{BBCF Move Card | ||
| image=[[file:Rwija.png|220px|test caption|style="margin: auto; width: 100%; max-width: 2560px;"]] | | image=[[file:Rwija.png|220px|test caption|style="margin: auto; width: 100%; max-width: 2560px;"]] | ||
| hitbox=[[file:Rwijahit.png|220px|test caption]] | | hitbox=[[file:Rwijahit.png|220px|test caption]] | ||
| damage=300 | guard=High | startup=7 | active=3 | recovery=15 | frameadv= | | damage=300 | guard=High | startup=7 | active=3 | recovery=15 | frameadv= | attribute=Head | invul= | strate=and | p1=this | p2=is | atklv=additional | odr=data | ||
|description= | |description= | ||
* Double-jump cancellable on block and on hit. | * Double-jump cancellable on block and on hit. | ||
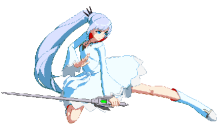
| Line 232: | Line 224: | ||
| image=[[file:Rwijb.png|220px|test caption|style="margin: auto; width: 100%; max-width: 2560px;"]] | | image=[[file:Rwijb.png|220px|test caption|style="margin: auto; width: 100%; max-width: 2560px;"]] | ||
| hitbox=[[file:Rwijbhit.png|220px|test caption]] | | hitbox=[[file:Rwijbhit.png|220px|test caption]] | ||
| damage=700 | guard=High | startup=11 | active=3 | recovery=28 | frameadv= | attribute=Head | invul= | strate=and | p1=this | p2=is | atklv=additional | odr=data | |||
|description= | |description= | ||
* Double-jump cancellable on block and on hit. | * Double-jump cancellable on block and on hit. | ||
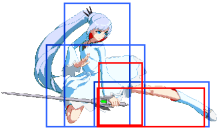
| Line 245: | Line 238: | ||
| image=[[file:Rwij6b.png|220px|test caption|style="margin: auto; width: 100%; max-width: 2560px;"]][[file:Rwij6bfoot.png|220px|test caption|style="margin: auto; width: 100%; max-width: 2560px;"]] | | image=[[file:Rwij6b.png|220px|test caption|style="margin: auto; width: 100%; max-width: 2560px;"]][[file:Rwij6bfoot.png|220px|test caption|style="margin: auto; width: 100%; max-width: 2560px;"]] | ||
| hitbox=[[file:Rwij6bhit.png|220px|test caption]][[file:Rwij6bfoothit.png|220px|test caption]] | | hitbox=[[file:Rwij6bhit.png|220px|test caption]][[file:Rwij6bfoothit.png|220px|test caption]] | ||
|damage=500 | guard=High | startup=9, 16 | active=7, 5 | recovery=16 | frameadv= | |damage=500 | guard=High | startup=9, 16 | active=7, 5 | recovery=16 | frameadv= | attribute=Head, Body | invul= | strate=and | p1=this | p2=is | atklv=additional | odr=data | ||
|description= | |description= | ||
* Double-jump cancellable on block and on hit. | * Double-jump cancellable on block and on hit. | ||
| Line 251: | Line 244: | ||
* Can cancel into {{clr|2|j.B}} by just pressing {{clr|2|B}}. | * Can cancel into {{clr|2|j.B}} by just pressing {{clr|2|B}}. | ||
Weiss stabs straight forward, leaving a lingering hitbox as she holds out her sword. The second hitbox can multihit, and also covers her leg which can | Weiss stabs straight forward, leaving a lingering hitbox as she holds out her sword. The second hitbox can multihit, and also covers her leg which can lead to character specific combos. Due to how long the move lasts, it is extremely likely that you will land before it ends even if used while rising, making it effectively more plus on block. This makes it {{clr|2|j.6B}} excellent for facilitating air-ground block pressure | ||
}} | }} | ||
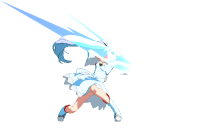
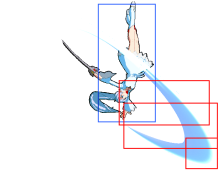
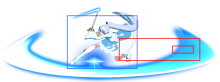
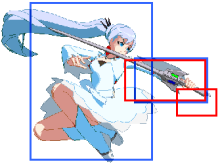
===<big>{{clr|3|j.C}}</big>=== | ===<big>{{clr|3|j.C}}</big>=== | ||
{{ | {{BBCF Move Card | ||
| | | image=[[file:Rwijc.png|220px|test caption|style="margin: auto; width: 100%; max-width: 2560px;"]] | ||
| hitbox=[[file:Rwijchit.png|220px|test caption]] | |||
|damage=600 | guard=High | startup=13 | active=3 | recovery=Until L+21L | frameadv= | attribute=Head | invul= | strate=and | p1=this | p2=is | atklv=additional | odr=data | |||
|description= | |description= | ||
* Slightly propels Weiss up | * Slightly propels Weiss up if she is falling beyond a certain speed. | ||
* Causes a hard knockdown on hit, making it essential for routing. | * Causes a hard knockdown on hit, making it essential for routing. | ||
* Is an IOH in | * Is an IOH in some matchups, but whiffs on short characters. | ||
* +1 if land cancelled. | |||
Once inputted, Weiss must commit to this move until she lands. However, with the power of {{clr| | Once inputted, Weiss must commit to this move until she lands. However, with the power of {{clr|4|214A}}/{{clr|2|214B}} landcanceling, you can omit this rule and act freely as desired. 17 frame overhead, and offers high/low potential in specific matchups. From this point, you can land-cancel (214~x A/{{clr|2|B}}). Can confirm rising hit with land cancel {{clr|4|5A}} or {{clr|2|6B}}, and can go into heavy damage if a Black Gravity Glyph is nearby. | ||
As Forward Air Dash moves her upwards, she won't be moving fast enough to cause the upwards propulsion after an IAD, making this for great jump-ins leading into land cancel pressure. | |||
Learn to land cancel and dramatically expand your offense: https://www.youtube.com/watch?v=N_D0biRm_-Q | Learn to land cancel and dramatically expand your offense: https://www.youtube.com/watch?v=N_D0biRm_-Q | ||
| Line 270: | Line 268: | ||
==Drive Normals== | ==Drive Normals== | ||
===<big> | ===<big>Close Glyph</big>=== | ||
{{InputBadge|{{clr|5| | {{InputBadge|{{clr|5|2D, 4D}} (Chargeable)}} | ||
{{ | {{BBCF Move Card | ||
| | | image=[[file:Ice_Shard_Close.png|220px|test caption|style="margin: auto; width: 100%; max-width: 2560px;"]] | ||
|damage=700 | guard=All | startup=2D:60<br>4D:70<br>OD:70 | active=Until Hit | recovery=White:40<br>Black:36 | frameadv= | attribute=Projectile | invul= | strate=and | p1=this | p2=is | atklv=additional | odr=data | |||
|description= | |description= | ||
* | * Only 1 Close Glyph can exist at the same time. | ||
'''Ice Shard (White Glyph)''' {{InputBadge|{{clr|5|Press D}}}}<br> | |||
* Fatal Counter | |||
* White Glyphs summon a projectile that tracks the opponent. | |||
* Close White Glyphs lock you out of using {{clr|5|2D}} and {{clr|5|4D}} until they disappear. | |||
{{clr|5|2D}} and {{clr|5|4D}} shoot the shot on frame 60 and 70 respectively, making {{clr|5|2D}} the fastest out of all of Weiss' drive versions. This is somewhat offset by the fact that they will likely spawn farther from your opponent. These traits can be used to make certain approaches safer by having the Ice Shard cover your startup or recovery. | |||
'''Gravity Glyph (Black Glyph)''' {{InputBadge|{{clr|5|Hold D}}}}<br> | |||
* Black Glyphs are required to use [[#Twisting Air Step|Twisting Air Step]], [[#Piercing Air Step|Piercing Air Step]], and [[#Pirouette|Pirouette]]. | |||
{{InputBadge|{{clr| | * Black Glyphs last forever, but don't lock you out of {{clr|5|2D}} or {{clr|5|4D}}. Instead, they disappear when a new Close Glyph is placed or when consumed by {{clr|4|8A}} , {{clr|2|8B}} or {{clr|3|8C}}. | ||
{{ | |||
| | |||
{{clr|5|[2D]}} and {{clr|5|[4D]}} are incredibly useful midscreen oki tools. Forcing the opponent to face glyph pressure on wakeup or roll. It can also be used to enable quick approaches with {{clr|4|8A}} , {{clr|2|8B}} or {{clr|3|8C}} when backed up by an Ice Shard. {{clr|5|[2D]}} should be your go to when placing a Black Glyph. | |||
'''Ice Shard + Gravity Glyph''' {{InputBadge|{{clr|5|Press D}} during overdrive}} | |||
{{InputBadge|{{clr| | |||
During OD, Weiss places down a white glyph and a black glyph on top of each other. The white glyph will be on top until it disappears, but the black glyph is still there underneath. <br>The white glyph shoots its shot on frame 70. | |||
}} | }} | ||
===<big> | ===<big>Far Glyph</big>=== | ||
{{InputBadge|{{clr| | {{InputBadge|{{clr|5|5D, 6D}} (Chargeable)}} | ||
{{ | {{BBCF Move Card | ||
| | | image=[[file:Ice_Shard_Far.png|220px|test caption|style="margin: auto; width: 100%; max-width: 2560px;"]] | ||
|damage=700 | guard=All | startup=90<br>OD:70 | active=Until Hit | recovery=White:40<br>Black:36 | frameadv= | attribute=Projectile | invul= | strate=and | p1=this | p2=is | atklv=additional | odr=data | |||
|description= | |description= | ||
* Only 1 Far Glyph can exist at the same time. | |||
'''Ice Shard (White Glyph)''' {{InputBadge|{{clr|5|Press D}}}}<br> | |||
{{InputBadge|{{clr| | * Fatal Counter | ||
{{ | * White Glyphs summon a projectile that tracks the opponent. | ||
| | * Far White Glyphs lock you out of using {{clr|5|5D}} and {{clr|5|6D}} until they disappear. | ||
}} | |||
{{clr|5|5D}} and {{clr|5|6D}} both shoot the shot on frame 90, which is the longest out of all of Weiss' drive versions, making it even harder to use these in neutral. This is somewhat offset by the fact that they will likely spawn closer to your opponent. The long startup also makes it useful for block pressure after oki, especially in the corner. | |||
'''Gravity Glyph (Black Glyph)''' {{InputBadge|{{clr|5|Hold D}}}}<br> | |||
{{InputBadge|{{clr| | * Black Glyphs are the resource required to use [[#Twisting Air Step|Twisting Air Step]], [[#Piercing Air Step|Piercing Air Step]], and [[#Pirouette|Pirouette]]. | ||
{{ | * Black Glyphs last forever, but don't lock you out of {{clr|5|5D}} or {{clr|5|6D}}. Instead, they disappear when a new Far Glyph is placed or when consumed by {{clr|4|8A}} , {{clr|2|8B}} or {{clr|3|8C}}. | ||
| | |||
| | |||
| | |||
Glyphs can't go past the wall, so don't worry about overshooting and making your black glyph unusable. | |||
{{ | '''Ice Shard + Gravity Glyph''' {{InputBadge|{{clr|5|Press D}} during overdrive}} | ||
}} | |||
During OD, Weiss places down a white glyph and a black glyph on top of each other. The white glyph will be on top until it disappears, but the black glyph is still there underneath. <br>The white glyph shoots its shot on frame 70. | |||
}} | }} | ||
===<big> | ===<big>Air Glyph</big>=== | ||
{{InputBadge|{{clr| | {{InputBadge|{{clr|5|j.D, j.2D}} (Chargeable)}} | ||
{{ | {{BBCF Move Card | ||
| | | image=[[file:Ice_Shard_Air.png|220px|test caption|style="margin: auto; width: 100%; max-width: 2560px;"]] | ||
| | |damage=700 | guard=All | startup=90<br>OD:70 | active=Until Hit | recovery=White:43<br>Black:36 | frameadv= | attribute=Projectile | invul= | strate=and | p1=this | p2=is | atklv=additional | odr=data | ||
|description= | |description= | ||
* | * Only 1 Air Glyph can exist at the same time. | ||
* | * 5D is placed at the same height as Weiss | ||
* 2D is always placed at the same height relative to the ground. | |||
'''Ice Shard (White Glyph)''' {{InputBadge|{{clr|5|Press D}}}}<br> | |||
* Fatal Counter | |||
* White Glyphs summon a projectile that tracks the opponent. | |||
* Air White Glyphs lock you out of using {{clr|5|j.D}} and {{clr|5|j.2D}} until they disappear. | |||
{{InputBadge|{{clr| | * Weiss jumps off her platform after using this move. | ||
{{ | |||
| | |||
| | |||
| | |||
* | |||
{{clr|5|j.D}} and {{clr|5|j.2D}} both shoot the shot on frame 90, which can leave enough time to come down with an air-ground and perform a riskier blockstring once landed with protection from the shot. Somewhat niche as the hop at the end can make it awkward. | |||
'''Gravity Glyph (Black Glyph)''' {{InputBadge|{{clr|5|Hold D}}}}<br> | |||
{{InputBadge|{{clr| | * Black Glyphs are the resource required to use [[#Twisting Air Step|Twisting Air Step]], [[#Piercing Air Step|Piercing Air Step]], and [[#Pirouette|Pirouette]]. | ||
* Black Glyphs last forever, but don't lock you out of {{clr|5|5D}} or {{clr|5|6D}}. Instead, they disappear when a new Far Glyph is placed or when consumed by {{clr|4|8A}} , {{clr|2|8B}} or {{clr|3|8C}}. | |||
| | |||
| | |||
| | |||
ALWAYS use {{clr|5|[j.2D]}} before coming down with [[#Snowfall|Snowfall]] if you have the time. The angle it's placed at ensures you will be in range to use the black glyph.<br> | |||
}} | {{clr|5|[j.D]}} is usually only used right before landing or when you want to use {{clr|5|[5D]}} but need the Far Glyph slot open for Ice Shard. | ||
'''Ice Shard + Gravity Glyph''' {{InputBadge|{{clr|5|Press D}} during overdrive}} | |||
{{InputBadge|{{clr| | |||
Weiss | During OD, Weiss places down a white glyph and a black glyph on top of each other. The white glyph will be on top until it disappears, but the black glyph is still there underneath. <br>The white glyph shoots its shot on frame 70. | ||
}} | }} | ||
==Universal Mechanics== | |||
===<big>Forward Throw</big>=== | |||
{{InputBadge|{{clr|2|5B}}+{{clr|3|C}}}} | |||
===<big> | ===<big>Back Throw</big>=== | ||
{{InputBadge|{{clr| | {{InputBadge|{{clr|2|4B}}+{{clr|3|C}}}} | ||
{{ | |||
| | |||
===<big>Air Throw</big>=== | |||
}} | {{InputBadge|{{clr|2|j.B}}+{{clr|3|C}}}} | ||
===<big> | ===<big>Counter Assault</big>=== | ||
{{InputBadge|{{clr| | {{InputBadge|{{clr|4|6A}}+{{clr|2|B}} while Blocking}} | ||
===<big>Crush Trigger</big>=== | |||
{{InputBadge|{{clr|4|5A}}+{{clr|2|B}} (chargeable)}} | |||
<br style="clear:both;"/> | |||
==Specials== | |||
===<big> | ===<big>Glyph Dash Strike</big>=== | ||
{{InputBadge|{{clr| | {{InputBadge|{{clr|4|214A}}/{{clr|2|B}} (Chargeable)}} | ||
===<big>Snowfall</big>=== | |||
{{InputBadge|{{clr|4|j.214A}}/{{clr|2|B}}}} | |||
===<big>Ice Pillar</big>=== | |||
}} | {{InputBadge|{{clr|4|22A}}/{{clr|2|B}}}} | ||
===<big> | ===<big>Twisting Air Step</big>=== | ||
{{InputBadge|{{clr| | {{InputBadge|{{clr|4|8A}} under certain conditions}} | ||
===<big>Piercing Air Step</big>=== | |||
{{InputBadge|{{clr|2|8B}} under certain conditions}} | |||
===<big>Pirouette</big>=== | |||
{{InputBadge|{{clr|3|8C}} under certain conditions}} | |||
===<big>Glyph Dash Triple Strike</big>=== | |||
{{InputBadge|{{clr|5|214D}} requires 25 heat}} | |||
===<big>Snowstorm</big>=== | |||
}} | {{InputBadge|{{clr|5|j.214D}} requires 25 heat}} | ||
===<big> | ===<big>Summon: Sword</big>=== | ||
{{InputBadge|{{clr|5| | {{InputBadge|{{clr|5|22D}} requires 25 heat}} | ||
===<big>Precision Parry</big>=== | |||
{{InputBadge|{{clr|5|236D}} requires 25 heat}} | |||
}} | |||
===<big>Ice Shatter</big>=== | ===<big>Ice Shatter</big>=== | ||
{{InputBadge|{{clr| | {{InputBadge|{{clr|4|22A}}/{{clr|2|B}} during overdrive}} | ||
===<big>Glyph Step</big>=== | |||
{{InputBadge|{{clr|5|j.8D}} during overdrive}} | |||
<br style="clear:both;"/> | <br style="clear:both;"/> | ||
==Distortion Drives== | ==Distortion Drives== | ||
===<big>Glacial Torrent</big>=== | ===<big>Glacial Torrent</big>=== | ||
{{InputBadge| | {{InputBadge|{{clr|3|236236C}} requires 50 heat}} | ||
}} | |||
===<big>Snow Flurry</big>=== | ===<big>Snow Flurry</big>=== | ||
{{InputBadge|{{clr| | {{InputBadge|{{clr|3|632146C}} requires 50 heat}} | ||
}} | |||
<br style="clear:both;"/> | <br style="clear:both;"/> | ||
==Astral Heat== | ==Astral Heat== | ||
===<big>White Night</big>=== | ===<big>White Night</big>=== | ||
{{InputBadge|{{clr| | {{InputBadge|{{clr|5|3412361D}} doesn't exist yet lol :)}} | ||
{{BBTag Move Card|game=BBTag | {{BBTag Move Card|game=BBTag | ||
|input=222BC | |input=222BC | ||
| Line 553: | Line 425: | ||
* Can be combo'ed into | * Can be combo'ed into | ||
Weiss traps her enemy into a large Glyph, bombarding them with various projectiles before gracefully disintegrating them with the sword of her Arma Gigas. Whiffs if the opponent is directly in front of Weiss or not within the hitbox of the giant grounded glyph. Her astral can be combo'ed into anywhere on the screen. There are only two routes you are allowed to confirm into this in the corner: {{clr| | Weiss traps her enemy into a large Glyph, bombarding them with various projectiles before gracefully disintegrating them with the sword of her Arma Gigas. Whiffs if the opponent is directly in front of Weiss or not within the hitbox of the giant grounded glyph. Her astral can be combo'ed into anywhere on the screen. There are only two routes you are allowed to confirm into this in the corner: {{clr|4|5A}}>{{clr|4|5AA}}>{{clr|4|5AAA}}>Astral, and Throw>{{clr|4|214[A]}}>Astral. Every other case will cause the astral to whiff out of bounds. | ||
}} | }} | ||
Latest revision as of 07:40, 20 March 2024
< Back to Blazblue Centralfiction Mods
This page is under construction, please ignore it for the time being
Overview
Overview
Weiss is a character that specializes in setups, having a tool for every situation. Whether it's using her long reaching rapier attacks to fight up close, firing ice shards to attack from afar, summoning ice pillars to block projectiles and limit the opponent's ground movements and using her semblance to do attacks that cover a lot of ground quickly or for some more tricky options, Weiss has a tool to fight comfortably in any situation.
At the same time, these tools all have very clear pros and cons. For example, her normals often have long reach but don't hit in a wide arc like Ruby's normals. As a result, a lot of Weiss' tools need to be selectively chosen to deal with a specific problem. To get the most out of Weiss' vast toolset, you'll need to train yourself to properly recognize situations and use the appropriate tool to handle it.
While her buttons can be oppressive, Weiss is highly susceptible to pushblock, having few options to get back in on the opponent without ending her turn or wasting resources. It can be difficult for her to maintain pressure without using committal options that can be stuffed out.
| Pros | Cons |
|
|
Weiss Schnee

Health: 11000

Prejump: 4F

Backdash: 23F (1~7F full invul)

Unique Movement: Arched Forward Air Dash
                 Glyph Step

Reversals:

Abare Options: 5A (7F)
               2A (7F)

Fatal Starters: 6C
                Ice Shard
Semblance: Glyphs
Weiss' semblance allows her to set magical glyphs around the stage by using her Drive normals, holding different directions to control the location the glyph is spawned at.
- By tapping the D button she will place a White Ice Shard Glyph, which launches a projectile after a delay before disappearing. The timing of the shot depends on the version used.
- By holding the D button she will place a Black Gravity Glyph which can then be used during Glyph Dash Strike or Snowfall, by pressing (or holding down) 8A, 8B, or 8C once she is in close proximity to a gravity glyph. These glyphs won't disappear unless a new glyph of the same type (near/far/air) is used.
Weiss also has access to a set of special moves that consume 25% Heat. Similar to Jin Kisaragi, all of these specials use the D button.
Overdrive
Weiss' Overdrive powers up many aspects of her semblance. Enhancing some moves that utilize glyphs, and giving her some new ones to boot.
- Weiss no longer has to pick between Ice Shard or a Gravity Glyph. Using any D normals will summon both on top of each other. All white glyphs created during OD will fire the Ice Shard on frame 70.
- Weiss can cancel into 8A Twisting Air Step, 8B Piercing Air Step, or 8C Pirouette from any normal on-hit or on-block assuming a black gravity glyph is nearby.
- Instead of Ice Pillar, 22A/B becomes Ice Shatter, a long range freeze attack.
- Gains access to 8D Glyph Step, which works similar Izanami's hover, allowing Weiss to extend combos and blockstrings.
Normals
5A

| Damage | Guard | Startup | Active | Recovery | Frame Advantage | Attribute | Invulnerability |
|---|---|---|---|---|---|---|---|
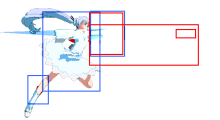
| 375 | All | 7 | 3 | 12 | -1 | Body |
- Jump cancellable on hit.
- Startup is two frames faster than 5B, and can OTG.
Secondary poke tool. Unlike 5B, can hit some crouching opponents. It being a 7 frame option allows for her to contest stronger round starts and hit low profiling moves.
| Starter Rating | P1 | P2 | Attack Level | On Overdrive |
|---|---|---|---|---|
| and | this | is | additional | data |
5B


| Damage | Guard | Startup | Active | Recovery | Frame Advantage | Attribute | Invulnerability |
|---|---|---|---|---|---|---|---|
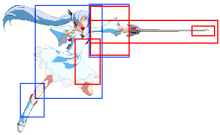
| 640 | Mid | 9 | 3 | 19 | -5 | Body |
- Jump cancellable on hit.
- Excellent horizontal poke.
- Excellent round starter, being able to hit most characters at round start.
5B is your primary poking tool boasting good reach and fast startup. Unlike 5A, it's hitbox only covers Myrtenaster, meaning it will whiff on many crouchers and low profile attacks.
| Starter Rating | P1 | P2 | Attack Level | On Overdrive |
|---|---|---|---|---|
| and | this | is | additional | data |
5C


| Damage | Guard | Startup | Active | Recovery | Frame Advantage | Attribute | Invulnerability |
|---|---|---|---|---|---|---|---|
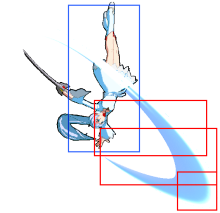
| 800 | Mid | 14 | 3 | 21 | -5 | Body | 7~18 Head |
- Jump-cancelable on block and on hit.
- If cancelled into from 6B, frames 1-6 are skipped
ayo i need to changee the head invul that is way too much
| Starter Rating | P1 | P2 | Attack Level | On Overdrive |
|---|---|---|---|---|
| and | this | is | additional | data |
2A


| Damage | Guard | Startup | Active | Recovery | Frame Advantage | Attribute | Invulnerability |
|---|---|---|---|---|---|---|---|
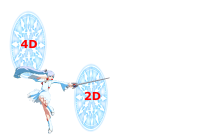
| 300 | All | 7 | 3 | 12 | -1 | Foot |
- Jump-cancelable on block and on hit.
- Chains into itself 3 times like most 2A.
Larger than average range for a 2A; one of Weiss' greatest tools. During neutral you'll want to mix this with 5A against a grounded opponent to keep them from getting up, close and personal. One of Weiss' strongest pressuring tools, as it allows for potential TRM setups/tickthrows, frametraps, and even callouts.
| Starter Rating | P1 | P2 | Attack Level | On Overdrive |
|---|---|---|---|---|
| and | this | is | additional | data |
2B


| Damage | Guard | Startup | Active | Recovery | Frame Advantage | Attribute | Invulnerability |
|---|---|---|---|---|---|---|---|
| 700 | Low | 12 | 3 | 18 | -4 | Foot |
Low poke with really good range. Mostly used either during blockstrings or to extend combos. Not so much a move to consider while in neutral, as it has long startup and hits really low, leaving her wide open if jumped over. This move is highly susceptible to barrier, as it can cause 5C and 3C followups to whiff.
| Starter Rating | P1 | P2 | Attack Level | On Overdrive |
|---|---|---|---|---|
| and | this | is | additional | data |
2C


| Damage | Guard | Startup | Active | Recovery | Frame Advantage | Attribute | Invulnerability |
|---|---|---|---|---|---|---|---|
| 800 | Mid | 13 | 3 | 27 | -11 | Body | 11~16 Head |
- Jump-cancelable on block and on hit.
- Has the same range as 5A.
- On-hit allows for safe Glyph setup.
Weiss leans forward and performs a wide sweeping slash. Slow startup, and a small hitbox.
| Starter Rating | P1 | P2 | Attack Level | On Overdrive |
|---|---|---|---|---|
| and | this | is | additional | data |
Command Normals
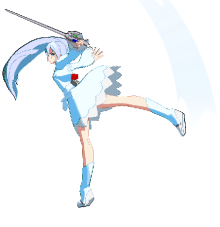
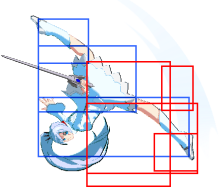
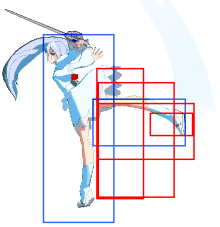
6A


| Damage | Guard | Startup | Active | Recovery | Frame Advantage | Attribute | Invulnerability |
|---|---|---|---|---|---|---|---|
| 777 | Low | 12 | 3 | 23 | -7 | Foot |
- Great in land cancel combos
Weiss jumps forward before dropping low and stabbing with Myrtenaster. The jump travels relatively far horizontally and goes further with momentum.
Although it can only be cancelled into from 5A, 5B and 2A, 6A is a great fakeout tool when used in stagger pressure.
On hit, this move sends the opponent sliding, making it a decent combo ender [or extender with black glyphs]. Weiss can choose whether or not she wants to set up a glyph/pillar or safejump afterwards.
On Counterhit, Weiss can setup a black glyph AND still have time to chain into 214A/B/D Glyph Dash Strike, leading into massive damage.
| Starter Rating | P1 | P2 | Attack Level | On Overdrive |
|---|---|---|---|---|
| and | this | is | additional | data |
6B


| Damage | Guard | Startup | Active | Recovery | Frame Advantage | Attribute | Invulnerability |
|---|---|---|---|---|---|---|---|
| 500, 700 | Mid | 12 | 6(2), 3 | 16 | -4 | Head, Body |
- Provides a dragdown effect. Stabilizes air confirms and allows her to chain into other normals without worry.
- Can buffer an input to cancel into 5C or 3C, skipping the first 6 frames of each.
Weiss leaps forward whilst backflipping and kicks down hard on the landing. Horizontal jump distance increases with distance from the opponent and can go more than half screen at max range. Weiss' main way to resist barrier, 6B is a staple of combos and blockstrings alike.
The damage shown in the above table is unscaled. If both hits connect it does a maximum of 836 damage.
The startup shown in the above table refers to the first hit. The second hit always happens when Weiss lands, the timing of which can vary if used during Glyph Step.
The active frames shown in the above table can be a bit confusing. 6(2) means that the first hit lasts 6 frames continuously, but is divided between 2 frames of animation, each lasting 3 frames. The 3 refers to the second hit.
| Starter Rating | P1 | P2 | Attack Level | On Overdrive |
|---|---|---|---|---|
| and | this | is | additional | data |
6C


| Damage | Guard | Startup | Active | Recovery | Frame Advantage | Attribute | Invulnerability |
|---|---|---|---|---|---|---|---|
| 880 | High | 23 | 3 | 6+15L | -2 | Head |
- Land cancellable
- Fatal Counter
- Because Weiss is airborne, most lows will miss.
Weiss' only standing overhead. Sends the opponent sliding on hit.
| Starter Rating | P1 | P2 | Attack Level | On Overdrive |
|---|---|---|---|---|
| and | this | is | additional | data |
3C


| Damage | Guard | Startup | Active | Recovery | Frame Advantage | Attribute | Invulnerability |
|---|---|---|---|---|---|---|---|
| 800 | Low | 16 | 3 | 27 | -11 | Foot |
- Has the same range as 5A
- Great combo ender, allows for safe glyph setup on hit
Weiss leans forward and performs a wide sweeping slash.
6C is Weiss' main combo ender when she isn't cashing out. Allowing her to safely place a glyph or 22A/B Ice Pillar in time to meaty the opponent's wakeup.
NEVER use this on block. 6C has slow startup, and a surprisingly small hitbox, making it reactable and susceptible to whiffing at mid range.
| Starter Rating | P1 | P2 | Attack Level | On Overdrive |
|---|---|---|---|---|
| and | this | is | additional | data |
Air Normals
j.A


| Damage | Guard | Startup | Active | Recovery | Frame Advantage | Attribute | Invulnerability |
|---|---|---|---|---|---|---|---|
| 300 | High | 7 | 3 | 15 | Head |
- Double-jump cancellable on block and on hit.
- Chains into itself 3 times, although the range is such that hitting even 2 before landing is difficult on most characters.
| Starter Rating | P1 | P2 | Attack Level | On Overdrive |
|---|---|---|---|---|
| and | this | is | additional | data |
j.B


| Damage | Guard | Startup | Active | Recovery | Frame Advantage | Attribute | Invulnerability |
|---|---|---|---|---|---|---|---|
| 700 | High | 11 | 3 | 28 | Head |
- Double-jump cancellable on block and on hit.
- Can crossup
- Your go-to jump-in normal
- Can cancel into j.6B by just pressing B.
Unlike j.6B, she hits downwards. This is a move you'll want to keep in mind more often, as it is the stronger overhead, crossup tool, and combo extender compared to j.6B.
| Starter Rating | P1 | P2 | Attack Level | On Overdrive |
|---|---|---|---|---|
| and | this | is | additional | data |
j.6B


| Damage | Guard | Startup | Active | Recovery | Frame Advantage | Attribute | Invulnerability |
|---|---|---|---|---|---|---|---|
| 500 | High | 9, 16 | 7, 5 | 16 | Head, Body |
- Double-jump cancellable on block and on hit.
- Extremely active, making it a great air to air.
- Can cancel into j.B by just pressing B.
Weiss stabs straight forward, leaving a lingering hitbox as she holds out her sword. The second hitbox can multihit, and also covers her leg which can lead to character specific combos. Due to how long the move lasts, it is extremely likely that you will land before it ends even if used while rising, making it effectively more plus on block. This makes it j.6B excellent for facilitating air-ground block pressure
| Starter Rating | P1 | P2 | Attack Level | On Overdrive |
|---|---|---|---|---|
| and | this | is | additional | data |
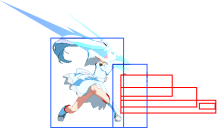
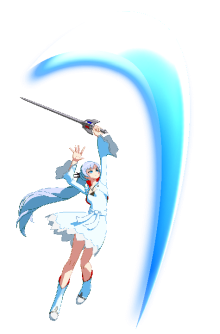
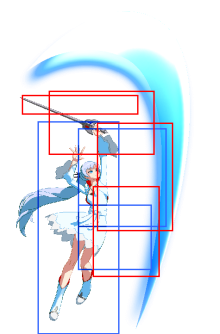
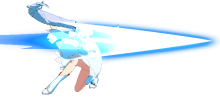
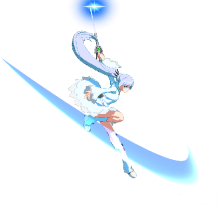
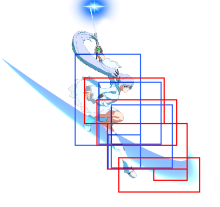
j.C


| Damage | Guard | Startup | Active | Recovery | Frame Advantage | Attribute | Invulnerability |
|---|---|---|---|---|---|---|---|
| 600 | High | 13 | 3 | Until L+21L | Head |
- Slightly propels Weiss up if she is falling beyond a certain speed.
- Causes a hard knockdown on hit, making it essential for routing.
- Is an IOH in some matchups, but whiffs on short characters.
- +1 if land cancelled.
Once inputted, Weiss must commit to this move until she lands. However, with the power of 214A/214B landcanceling, you can omit this rule and act freely as desired. 17 frame overhead, and offers high/low potential in specific matchups. From this point, you can land-cancel (214~x A/B). Can confirm rising hit with land cancel 5A or 6B, and can go into heavy damage if a Black Gravity Glyph is nearby.
As Forward Air Dash moves her upwards, she won't be moving fast enough to cause the upwards propulsion after an IAD, making this for great jump-ins leading into land cancel pressure.
Learn to land cancel and dramatically expand your offense: https://www.youtube.com/watch?v=N_D0biRm_-Q
| Starter Rating | P1 | P2 | Attack Level | On Overdrive |
|---|---|---|---|---|
| and | this | is | additional | data |
Drive Normals
Close Glyph
2D, 4D (Chargeable)

| Damage | Guard | Startup | Active | Recovery | Frame Advantage | Attribute | Invulnerability |
|---|---|---|---|---|---|---|---|
| 700 | All | 2D:60 4D:70 OD:70 |
Until Hit | White:40 Black:36 |
Projectile |
- Only 1 Close Glyph can exist at the same time.
Ice Shard (White Glyph) Press D
- Fatal Counter
- White Glyphs summon a projectile that tracks the opponent.
- Close White Glyphs lock you out of using 2D and 4D until they disappear.
2D and 4D shoot the shot on frame 60 and 70 respectively, making 2D the fastest out of all of Weiss' drive versions. This is somewhat offset by the fact that they will likely spawn farther from your opponent. These traits can be used to make certain approaches safer by having the Ice Shard cover your startup or recovery.
Gravity Glyph (Black Glyph) Hold D
- Black Glyphs are required to use Twisting Air Step, Piercing Air Step, and Pirouette.
- Black Glyphs last forever, but don't lock you out of 2D or 4D. Instead, they disappear when a new Close Glyph is placed or when consumed by 8A , 8B or 8C.
[2D] and [4D] are incredibly useful midscreen oki tools. Forcing the opponent to face glyph pressure on wakeup or roll. It can also be used to enable quick approaches with 8A , 8B or 8C when backed up by an Ice Shard. [2D] should be your go to when placing a Black Glyph.
Ice Shard + Gravity Glyph Press D during overdrive
During OD, Weiss places down a white glyph and a black glyph on top of each other. The white glyph will be on top until it disappears, but the black glyph is still there underneath.
The white glyph shoots its shot on frame 70.
| Starter Rating | P1 | P2 | Attack Level | On Overdrive |
|---|---|---|---|---|
| and | this | is | additional | data |
Far Glyph
5D, 6D (Chargeable)

| Damage | Guard | Startup | Active | Recovery | Frame Advantage | Attribute | Invulnerability |
|---|---|---|---|---|---|---|---|
| 700 | All | 90 OD:70 |
Until Hit | White:40 Black:36 |
Projectile |
- Only 1 Far Glyph can exist at the same time.
Ice Shard (White Glyph) Press D
- Fatal Counter
- White Glyphs summon a projectile that tracks the opponent.
- Far White Glyphs lock you out of using 5D and 6D until they disappear.
5D and 6D both shoot the shot on frame 90, which is the longest out of all of Weiss' drive versions, making it even harder to use these in neutral. This is somewhat offset by the fact that they will likely spawn closer to your opponent. The long startup also makes it useful for block pressure after oki, especially in the corner.
Gravity Glyph (Black Glyph) Hold D
- Black Glyphs are the resource required to use Twisting Air Step, Piercing Air Step, and Pirouette.
- Black Glyphs last forever, but don't lock you out of 5D or 6D. Instead, they disappear when a new Far Glyph is placed or when consumed by 8A , 8B or 8C.
Glyphs can't go past the wall, so don't worry about overshooting and making your black glyph unusable.
Ice Shard + Gravity Glyph Press D during overdrive
During OD, Weiss places down a white glyph and a black glyph on top of each other. The white glyph will be on top until it disappears, but the black glyph is still there underneath.
The white glyph shoots its shot on frame 70.
| Starter Rating | P1 | P2 | Attack Level | On Overdrive |
|---|---|---|---|---|
| and | this | is | additional | data |
Air Glyph
j.D, j.2D (Chargeable)

| Damage | Guard | Startup | Active | Recovery | Frame Advantage | Attribute | Invulnerability |
|---|---|---|---|---|---|---|---|
| 700 | All | 90 OD:70 |
Until Hit | White:43 Black:36 |
Projectile |
- Only 1 Air Glyph can exist at the same time.
- 5D is placed at the same height as Weiss
- 2D is always placed at the same height relative to the ground.
Ice Shard (White Glyph) Press D
- Fatal Counter
- White Glyphs summon a projectile that tracks the opponent.
- Air White Glyphs lock you out of using j.D and j.2D until they disappear.
- Weiss jumps off her platform after using this move.
j.D and j.2D both shoot the shot on frame 90, which can leave enough time to come down with an air-ground and perform a riskier blockstring once landed with protection from the shot. Somewhat niche as the hop at the end can make it awkward.
Gravity Glyph (Black Glyph) Hold D
- Black Glyphs are the resource required to use Twisting Air Step, Piercing Air Step, and Pirouette.
- Black Glyphs last forever, but don't lock you out of 5D or 6D. Instead, they disappear when a new Far Glyph is placed or when consumed by 8A , 8B or 8C.
ALWAYS use [j.2D] before coming down with Snowfall if you have the time. The angle it's placed at ensures you will be in range to use the black glyph.
[j.D] is usually only used right before landing or when you want to use [5D] but need the Far Glyph slot open for Ice Shard.
Ice Shard + Gravity Glyph Press D during overdrive
During OD, Weiss places down a white glyph and a black glyph on top of each other. The white glyph will be on top until it disappears, but the black glyph is still there underneath.
The white glyph shoots its shot on frame 70.
| Starter Rating | P1 | P2 | Attack Level | On Overdrive |
|---|---|---|---|---|
| and | this | is | additional | data |
Universal Mechanics
Forward Throw
5B+C
Back Throw
4B+C
Air Throw
j.B+C
Counter Assault
6A+B while Blocking
Crush Trigger
5A+B (chargeable)
Specials
Glyph Dash Strike
214A/B (Chargeable)
Snowfall
j.214A/B
Ice Pillar
22A/B
Twisting Air Step
8A under certain conditions
Piercing Air Step
8B under certain conditions
Pirouette
8C under certain conditions
Glyph Dash Triple Strike
214D requires 25 heat
Snowstorm
j.214D requires 25 heat
Summon: Sword
22D requires 25 heat
Precision Parry
236D requires 25 heat
Ice Shatter
22A/B during overdrive
Glyph Step
j.8D during overdrive
Distortion Drives
Glacial Torrent
236236C requires 50 heat
Snow Flurry
632146C requires 50 heat
Astral Heat
White Night
3412361D doesn't exist yet lol :) Template:BBTag Move Card
External References
| File:Ambox notice.png | To edit frame data, edit values in BBCF/Weiss Schnee/Data. |